Up next in 10


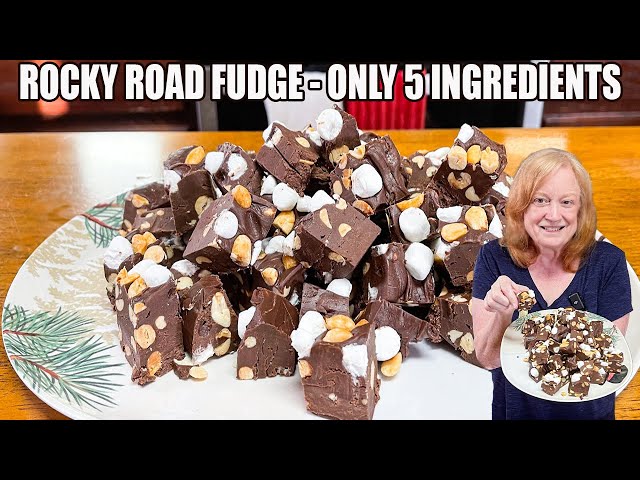
ROCKY ROAD FUDGE | Chocolate Fudge Candy | Christmas Candy
#catherinesplates #fudge #christmasfood
Today's Recipe: https://catherinesplates.com/rocky-road-fudge-candy/
Show More Show Less View Video Transcript
0:00
Welcome back everyone. Today we're going
0:03
to make a rocky road fudge with only
0:06
five ingredients.
0:08
Now, we're going to start by preparing
0:11
our baking dish. You want to have that
0:13
ready so that when the fudge is ready,
0:15
it can go right in there and it doesn't
0:17
harden up on you as you're trying to
0:20
prepare your baking dish. We've got a 8
0:23
by8, which is going to be the size for
0:25
this fudge recipe. And we're going to
0:28
take a piece of parchment paper
0:31
and I'm going to place it underneath of
0:34
our baking dish.
0:36
And then we're going to get some kitchen
0:39
shears and we're going to cut the
0:42
corners. Now, you want to cut your
0:44
parchment
0:46
larger than your baking dish. I use this
0:50
paper right here and it's already precut
0:53
and it's unbleached non-stick parchment
0:56
paper sheets by Comfy Life. This is in
0:59
my Amazon store. You can find that link
1:02
at my catherine's plates.com blog. It's
1:06
one of the tabs. You just go up there
1:07
and then you can find these there.
1:11
All right.
1:13
So, you're going to lay your dish right
1:14
on the piece of parchment. You're going
1:16
to take your scissors
1:19
and you're going to cut to the edges.
1:27
And then we're going to pull that one
1:28
off like that. We're going to do that
1:31
with each one of them. This will ensure
1:35
that your fudge comes out really nice
1:38
and even in there.
1:40
And one more.
1:47
All right. So, it should look like a
1:49
plus sign. Now, I'm going to bring my
1:51
baking dish over.
1:54
Now, what I want to do is lightly spray
1:56
the bottom of it. That'll help this
1:58
stick inside the baking dish and not
2:00
move around as we're pouring the fudge
2:02
into it. Just lightly on the bottom.
2:06
Now, just take your parchment that
2:08
you've cut,
2:10
pull it in, and fold it
2:15
on each one on each side.
2:24
That'll ensure a nice fit.
2:32
You're going to bring your baking dish
2:33
over.
2:35
We're going to place it in
2:37
and tuck it in.
2:42
Now, I'm just going to go around the
2:44
sides
2:46
on my edges here
2:48
and do the same thing. Just kind of
2:50
crease it so that it folds over.
2:58
All right, we're just going to set this
2:59
aside and let's make that fiveingredient
3:02
rocky road fudge.
3:05
All right, to make our fudge, we're
3:07
going to need three cups of semieet
3:09
chocolate chips. We're going to add
3:11
those to a just a mediumsiz skillet or
3:14
you could use a mediumsiz saucepan. So,
3:17
we're going to add those. Measure them
3:19
out. three cups.
3:28
I'm not turning on my burner yet until I
3:30
get all my chips in there.
3:38
To the three cups of chocolate chips,
3:42
we're going to add one can of sweetened
3:45
condensed milk. This is 14 oz.
3:50
Oh, is this the good stuff?
3:53
Yeah. Let's see.
4:02
That's some good stuff there.
4:05
Let's add it in.
4:13
You know, that's going to be good.
4:15
We're going to get every drop out of
4:17
there.
4:20
There we go. I can't help it. Let's do
4:23
another one.
4:27
All right, we're going to turn our
4:28
burner on to a medium low
4:37
and we're going to stir this continually
4:42
until all the chocolate chips melt
4:47
into that sweetened condensed milk.
4:52
And just keep going at it.
4:58
find it easier to use in the skillet
5:01
here.
5:02
Y'all, this is not my first fudge rodeo.
5:06
I've made a lot of fudge. You can go to
5:09
my blog, catherineplates.com, pipe
5:12
infin, and see all the different
5:14
varieties that I've made. I've got a
5:16
pistachio one out there if you're
5:18
looking for a green colored fudge for
5:21
Christmas. That's a really good one.
5:24
really yummy one.
5:26
Or you can go into the YouTube channel,
5:29
type in Catherine's Plates Fudge, and
5:32
see them all there.
5:34
All right, let's get all this mixed up.
5:38
For this recipe, you do not need a candy
5:41
thermometer.
5:43
Once everything is melted and it's very
5:46
smooth,
5:48
then you know we're done with this
5:50
process right here.
5:53
This was the two ingredients and we
5:55
still got three, four, and five.
5:58
So, just keep stirring until it is done.
6:01
Okay, this is what it's going to look
6:03
like when it's nice and smooth.
6:07
Look at that. We're done. So, to prevent
6:11
it from scorching, turn off your heat
6:14
and we're going to add in one teaspoon
6:17
of vanilla extract.
6:20
Stir that in. Woo!
6:29
Look at how glossy that looks.
6:32
That was the third ingredient was the
6:34
vanilla.
6:38
Now, we're going to measure in 1 and 1/2
6:41
cups of mini marshmallows.
6:45
Save some for the top of the recipe.
6:51
Woohoo! One
6:56
and a half.
7:00
All right.
7:01
See how thick this is getting? That's
7:03
why you want to make sure that your 8
7:05
by8 baking dish is prepared cuz you're
7:07
not going to have time for that. Let's
7:10
get these all mixed in.
7:13
You seeing that rocky road part in here?
7:20
We want it nice and combined.
7:24
All right, we're not going to mix too
7:25
much because we don't want to melt those
7:27
marshmallows in there too much. And then
7:30
we're going to add in one cup of chopped
7:32
nuts,
7:35
but I'm going to be putting in
7:39
some dry roasted peanuts. One cup. And
7:42
we'll fold that in.
7:56
till it's well combined.
8:01
Oh yeah, look at that. Mhm.
8:08
See the swirls in there? That looks
8:10
good.
8:12
Like I said, don't over mix too much
8:14
because you want to be able to see the
8:15
marshmallows in there.
8:18
And I might add
8:21
some more marshmallows
8:28
so we have some whole marshmallows mixed
8:30
in.
8:34
There we go.
8:38
All right, let's prep our fudge. All
8:40
right. Before your fudge sets in your
8:42
pan here, you're going to take it
8:46
and we're going to put it into our
8:47
baking dish. Look at that.
8:55
Yeah.
8:58
Y'all excited?
9:01
I am
9:03
definitely bringing this out for
9:05
Thanksgiving.
9:09
It's a really easy recipe.
9:14
The marshmallows and the peanuts or any
9:17
kind of nut that you want. That's going
9:19
to be your ingredient four and five. I'm
9:21
going to take my offset spatula and use
9:24
that to smooth everything out here.
9:29
These are great tools.
9:31
You can find everything that I'm using
9:33
in my Amazon store, which is found in my
9:38
recipe blog, katherineplates.com, under
9:40
store links. You just go there and go
9:41
into the Amazon store and you can find
9:43
everything that I use on my shows.
9:47
So, I'm just going to spread this out
9:49
nice and even.
9:58
Now, what I'm going to do is top
10:00
with some extra nuts
10:04
right across the top.
10:07
I'm just going to use a spoon just to
10:08
kind of dab them in.
10:11
And then I'm going to add some more
10:12
marshmallows.
10:14
That way people know what this is.
10:19
And then we will dab those in so they
10:22
sit in there really good.
10:30
Now, all you have to do is let this set
10:32
up. It could take about 1 to three
10:34
hours. You can put it in your
10:36
refrigerator. It'll set up even faster.
10:39
And then we're going to take it out, cut
10:40
it into little squares. Give it a try
10:43
for you. I'll be back, you guys.
10:49
I pulled this out of the refrigerator.
10:50
I'm going to take the plastic wrap off.
10:56
We're going to pull out the parchment.
11:01
We're going to cut these into bite-sized
11:03
pieces.
11:06
Take a large sharp knife. Let's go.
11:26
All right, we're going to go the other
11:27
way.
11:30
That's what I'm talking about right
11:31
there.
11:33
All right, let's plate it up. Oh, this
11:36
will look good on a dessert table.
11:40
Put these in a tin and give these out as
11:42
Christmas presents.
11:45
All right. Boom. There we go. What do
11:47
y'all think?
#Desserts
#Food
#Candy & Sweets